Showing posts with label Quick Tip. Show all posts

Monday, 23 August 2021

Techniques to use on chipboard

Good morning

A week or so ago on the Facebook Chat page Jane asked 

"Re: chipboard 
Do some of you paint it/ colour it in some way and if so how?" 

so today I want to share with you six ways I change
 the appearance of my chipboard to suit my layouts or cards.


Lets start with this one


The dragonfly chipboard I have used is from Memory Maze - Linda's Scribble and Butterflies
I have coated the dragonfly with glue and then sprinkled Dress My Crafts Frosted Sugar Powder all over it.
The arrow is from Memory Maze - Follow Your Dreams set. I coated it with white acrylic paint and then glue before covering it with white iridescent glitter.
The white paint certainly makes a difference to the finished look.

You could, of course, use any coloured paint under the Frosted Sugar Powder or glitter for a completely different look.

No. 2


Once again I have used a dragonfly from the Memory Maze - Linda's Scribble and Butterflies set.
This time I have given the chipboard a coat of black acrylic paint.
Once it was dry I used Uniquely Creatives Wavy Words stamp and Gold Ink
to stamp on top of the black paint.
If you liked you could add a coat of Glossy Accents or similar to give a high gloss finish to this technique.

No. 3


This chipboard is from Dusty Attics Mini Captions #2 set
I applied a solid cover of black acrylic paint and then a coat of Glossy Accents.

I love this technique for words and titles, it gives a high gloss domed look and 
looks fantastic on top of metallic paints too.

No. 4


The chipboard for this technique comes from Memory Maze - Card Sentiments 2

I used my Versamark Ink pad and white embossing powder to colour this piece. I actually gave it two coats of embossing powder so I got that nice smooth finish to the piece.
Once again this could be done in any colour.
Very fast and simple to do.

No 5


This chipboard comes from Memory Maze - Criss Cross Hearts

I applied a coat of Deco Foil Transfer Gel Duo, let that dry and then laid a sheet of 
Fab Foil in Gold on top of it and rolled over it with my brayer.

The foil did not stick to the whole surface but it has a very grunge modern look to it.

No. 6


The chipboard for this technique is from Memory Maze Wire Butterfly set.

I painted the butterfly with white acrylic paint and when it was dry I sprayed it with Glimmermist's Pumpkin Spice spray.

It has a beautiful shimmer in real life 

You could also add a layer of stamping between these two layers for added interest.

So there we have 6 way you could personalise your chipboard to suit your project. 
There are, of course, many many more.
I would love to hear or see your favourite ways of changing the look of your chipboard.

My process video is below.


Till next time
Stay safe
Hugs
Julie

Monday, 21 September 2020

Hi there.

A very quick post today to share one of my favourite background techniques.

All you need to make this is a few sprays, I used Glimmermists, and some Gladwrap (plastic wrap).


The longest part of this procedure is waiting for the sprays to dry.

The video below shows you just how easy it is to achieve these beautiful results.

Here are a couple of layouts I created in 2016 using this technique to create the backgrounds.

You can see I have used multiple colours on these background but the technique is the same.


I hope you give this a try, it is well worth it and very easy.

Till next time
Julie

Monday, 6 July 2020

Tip of the Week


This tip is very important! The best way to make sure you use your supplies is to have them close to hand and easy to access. The best way to have enough energy for a days scrapbooking is to ensure you have some tasty treats handy too. :-)

Thursday, 4 June 2020

Tip of the Week


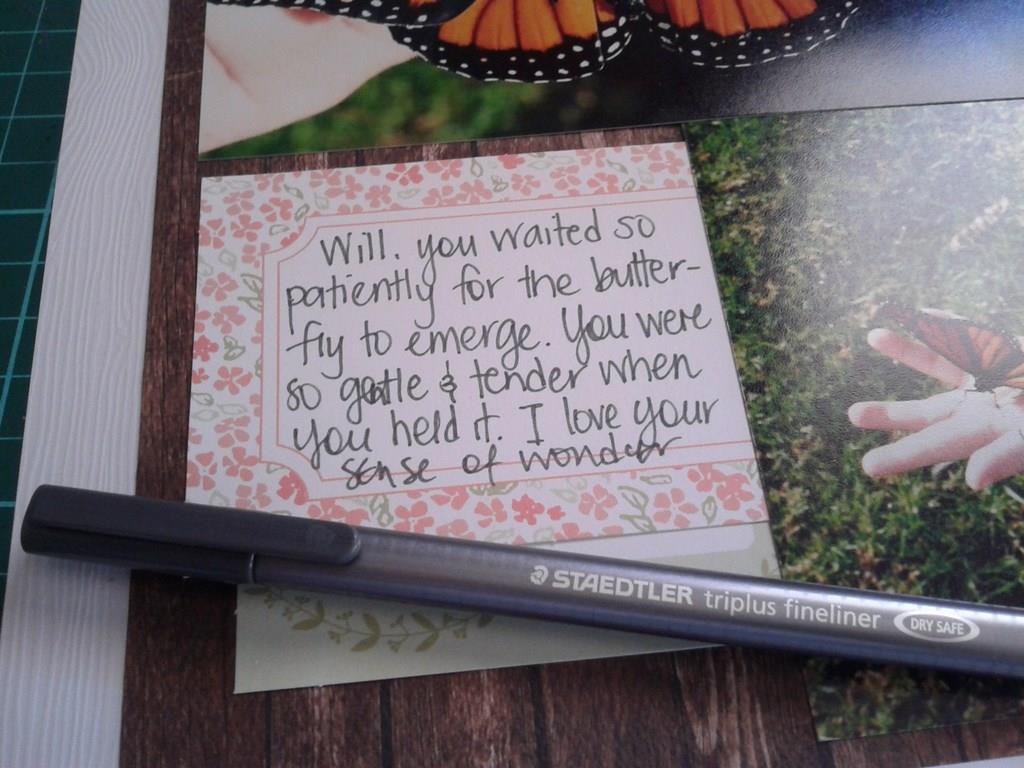
Sometimes black pen is a little too intense for the journaling on your page- that's why I like to have a couple of grey pens on hand. These Staedler Fineliners are great for the job. :-)

Thursday, 14 May 2020

Tip of the week: Stick-em!

This tip won't work for everyone but if you scrap/organise by colour then it might work for you. I staple all my rhinestones and pearls from the same colour range together so I can see at a glance which will work best on my page. Here are all my greens- I might need a stock-up. :-)

Thursday, 2 April 2020

Tip of the week: Got ink?


One of the smartest decisions I ever made was cutting out a bunch of stickers in little slivers. :-) I brought a packet of credit card-sized white adhesive labels at a discount store. Cut the stickers down to the size of the side of my Tim Holtz Distress Inks and then swiped them with ink. I did 4 strips per pad but you could just do one and make sure it's always facing out. I let them dry first and then wrote the name of the colour on the strip and then stuck them on... it take a little bit of time but saves heaps of time in the long run.

While you're at it grab the Distress Ink Printable Colour Chart from Ranger and stamp each colour you have on there too as a handy reference sheet.

Here's mine: I love to pull it out when I have to stamp on a layout and want to find the closest colour for my scheme.


Thursday, 12 March 2020

Tip of the week: Get thee a Colour Wheel!


Sometimes you look at your page and it just doesn't *feel* right... sometimes the problem is colour. There are some colours that work well together and some that just don't. An easy way to start learning what goes with what is to grab a colour wheel and do a little bit of internet reading about how it works. Try this link.

You can pick up a pretty good colour wheel from ebay for about $10. (I got mine from a paint store  back in New Zealand- it lives on my scrapbook table.

If you have a tricky colour in a photo or scrapbook paper that you don't know what to team it up with try having a play with The Canva Colour wheel- and find a colour scheme that works.

Here's a super simple video to get you started (what works in your house works on your page): 

Friday, 14 February 2020

Tip of the week: Wax your Titles

Have you seen the Art Alchemy Waxes in store? I have to admit I love them so much I have one of each colour.

Here's one of my favourite things to do with them- colouring my titles...


The wax goes on to every surface I have tried so far and that includes these Chipboard Titles from Cocoa Vanilla- which are great because they come in white so you can recolour them to suit your layout. Here I have used Blue lagoon and Sweet Rose. Finger brushed it on a gentle rub to blend. Let it dry and then rub to polish it up.


For this title I have dabbed the waxes on to black foam thickers. I've used Mint Sparkle and Peacock and the effect I get is a lot like Paua (Abalone) shell... love it!


Tuesday, 21 January 2020

Tuesday Tip: Out in Front


Do you have a bunch of stamps packed up in boxes that you aren't using?


What about making some shelf space for them- not all of them but just a few- often they are so pretty or interesting- it's easy to make a cute display and then when your in the process of making a page you can have a quick look and see if there's anything that will work for your page.

When the shelf is in need of some dusting- swap them around with some of the others in your stash.

Tuesday, 14 January 2020

Tuesday Tip: Back to School

I hate to say it but back to school is sneaking up- we're almost halfway through January already!

A super-easy way for your kids to spot their own gear lying around the classroom is to washi tape it!


So much of the washi tape we get comes in an extra-long roll and we'll never use it all- so I like to pick one each year for each kid and wrap a few lengths around as much of the pencil case contents that I can. That makes it easy for them to spot when it's fallen on the classroom floor or when it's out of the table they're sharing with classmates.

Tuesday, 17 December 2019

Tuesday Tip: Christmas in the mail


Each year I make this scrapbook page in January. I use a square punch to punch out cute parts of this years Christmas cards. I mount them on a 11x11in piece of card- and then mount that on a 12x12- leaving the top open to create a pocket.

I slot into the pocket all the Christmas letters, photos and sweet notes we have received in the mail over the holiday season.

I embellish the page with Christmas Postage stamps and any little pop-up pieces from the cards- then each year I add the same title and the year.


Tuesday, 19 November 2019

Tuesday Tip: Photo Cheat sheets

Want to improve your photography- or get out of automatic?  A great way is by getting out and experimenting- starting with the basic functioning of the settings on your camera is a jumping-off point. There are a lot of photography cheat-sheets around on the internet so you should be able to find one that suits you. I love this one (below) by Miguel Yatco and have a little laminated copy of it in the pocket of my camera bag. On the back I wrote some little reminders for myself and my daughter who is just starting to get into DSLR Photography.

1. Check your settings.
2. Think about the light.
3. Compostion; rule of thirds, reaching trees, white space.
4. Check the background, horizon, 4 corners, around people... no weird sproutings. Look at what you’re not looking at.
5. Work the angles, expend energy! Get closer, maybe move back too?
6. Practice, practice, practice, play!
7. Analyse your mistakes and successes.
8. Study what you love about other people’s photos.
9. Practice, practice, practice.


Tuesday, 29 October 2019

Tuesday Tip: Cutlery Tray

A curtlery tray or spice rack layed flat can make great storage for your Project Life and other journalling type cards. Keep an eye out in Op Shops or pick one up at Ikea or another storage type store.


Tuesday, 22 October 2019

Tuesday Tip: Punctuation Embellishments

Thickers especially but also other alphabets often come with a bunch of punctuation that never gets used for it's intended purpose. Rather than throw them out try using them as embellishments on your page. 


Tuesday, 15 October 2019

Tuesday Tip: White Kaiser Mist

 If you have a paper embellishment or die cut that's perfect for your page except that it's a little bright for your colour scheme try toning it down with White Kaiser mist. I used mini post-it notes to cover the head and limbs of the girl below before I gace her too-pink dress a quick spray. 


Tuesday, 8 October 2019

Tuesday Tip: Book Rings

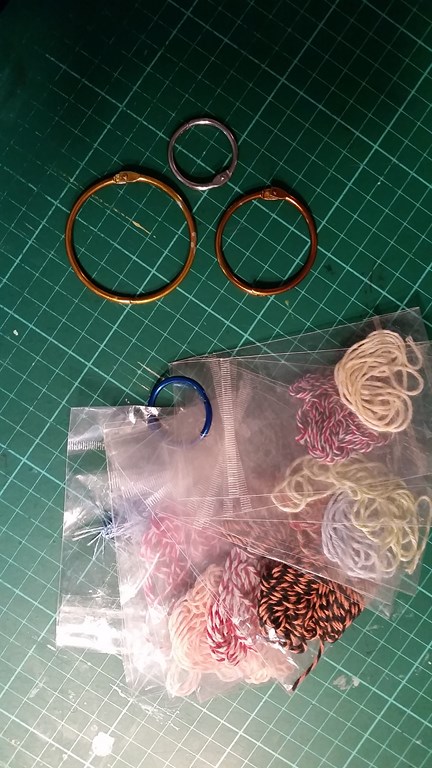
You can pick up book/binder rings in a variety of sizes at Officeworks and often newsagents will stock them too. I use them for ribbons and and keeping my twine all together. You can also use them for hanging things like packets of bling together and the larger ones would take quite a number of thickers, washi tapes, or sticker sheets. Of course you can also use them for making mini albums. I hang my ribbon one off my paper racks in the hopes I will see my ribbons right in front of me and use them more often!


Tuesday, 24 September 2019

Tuesday Tip


The curse of the missing letter: We all know the problem, you pull out a packet of letter stickers and have everything you need but that one letter- never fear, there's often a solution. In the example above I turned f into a t but the following are also often possible

a, b, d, p, q into c 
b into a or q or c
c+l = d, p, or b
d into p or a
f into t
g into a
h into n
j into i
m into w
n into u or r
p into d
Q into O
q into a
T or t into l
u into n
v + v = w
w into m
X into y
Z into N

0 into O
3 into E
6 into o
7 into L
8 and 9 into o
! into i 
& into 3 or 8

Tuesday, 17 September 2019

Tuesday Tip


For the perfect colour co-ordination for your photos have a stash of black and white Patterned papers on hand that you can colour yourself with paints, mists, coloured pencils and the like. Especially great with those tricky photos that have yellowed with age.

Tuesday, 10 September 2019

Tuesday Tip

If you are still working and don't want to go clean a glue or paint brush right away wrap it in a baby wipe and give it a little sprizt of water to stop it drying out.

Tuesday, 3 September 2019

Tuesday Tip


Kmart has these great little three tier shelves for just five dollars- great for putting things into view in your craft room!