I cut a section on the right hand edge of the layout away and replaced it with a piece of branding strip.
The small squares that run down both edges of the large film strip were backed with a strip of black cardstock.
The edges of the small filmstrip were coloured black using a pen. The squares in this embellishment also hold the journalling for this page.
The photos were trimmed to 3 1/2" square and attached to the back of the large film strip cut file.
A strip of black cardstock and another of the branding strips were layered
on each other and attached to the left hand edge of the layout.
Everything was attached to the page using Art Glitter Glue.
The "Enjoy the Journey" journalling card and the small film strip
were mounted on chipboard before being added to the layout.
The title was cut from black cardstock using Kaisercraft's "Alphabet Upper Case" dies.
Once they had been attached to the layout I coated them with the same Nuvo Drops I used on the background.
Here is the process video if you would like to watch this layout come together.
Hope you get to spend some time in your craft space soon
Stay safe
Hugs
Julie
Challenge Rules Please upload your entries to the album in our Private Facebook Chat Group by 11.55pm, 30th September 2021 to be eligible for the prize.
All of the papers have had the edges inked using a Kaisercraft ink cube, colour Bark.
I started by giving my Dusty Attic - Start Banner chipboard a coat of acrylic paint. The colour is Goldenrod which is a mustardy yellow. When the paint was dry I added a coat of the Gold glimmer pen from Uniquely Creative.
My 8" x 6" photo was matted on a piece of 8.25" x 6.25" coordinating cardstock
I used a bread & butter plate from my dinner set to draw the faux stitched partial circles above and below the patterned papers.
I also added faux stitching to all of the patterned papers, chipboard and sticker embellishments
The title was cut from the same cardstock I used to mat my photo using my Scan N Cut. I inked the edges, attached it to the bottom section of the layout and added faux stitching.
I have adjusted the sketch to accommodate my larger photo, I have added the torn paper at the top and bottom of the layout and I have also added the chipboard banner to the top of the layout. I moved the title to the bottom of the layout because it would look too cramped at the top with all of the other things I have added there. I also deleted the doily for the same reason.
Here is my process video if you would like to watch it.
Thank you for spending part of your day here with me today
I have a sketch challenge for you. Due to work commitments and not enough hours in the day I've picked a PageMaps one this month.
And here's my take.
Hope you have fun with this sketch.
Donna
Challenge 2
My challenge for you this month is to create a holiday/travel layout.
I know travel has been a bit restricted lately but you could use photos from travels before we heard about Covid or you might have been on a nice little weekend away that it is time to scrap
I have used Teal Cardstock for the background, I cut the centre from this cardstock leaving a 1" frame.
On top of that frame I places an 11.5" x 11.5" piece of the Dowager paper.
I added some splatters to this paper with Glimmer Mist's Black Magic
I cut a piece of the Shilling paper that was 5" wide x 12" following the zig zag pattern on both 12" edges.
I traced the zig zag edge onto a 7" piece of Parlor and cut this out.
The Shilling paper was attached on top of the Parlor paper.
This was then attached to the layout base with a piece of craft foam between them
I filed the edge of the photos with an emery board, inked them with the black ink and matted them onto some of the cardstock I removed from the middle of my background frame.
I added craft foam to the back of the photos before attaching them to my layout
To embellish the pennants a little I punched some tiny hearts from the teal cardstock and attached them.
The pennants were attached to the layout in the top left hand area and the speech bubble was attached to the top right hand area of the right hand photo.
The title was die cut from the teal cardstock using Kaisercraft's DD735 Uppercase Alpha dies.
The final touch was to give the tiny hearts and the title a good coat of Glossy Accents
You might like to watch my process video
Thanks for spending part of your day here with me today
Till next time
Stay safe
Hugs
Julie
Challenge 3
Our final challenge is a 3-2-1 ... Your free to create anything you wish, but you need to have,,,
3 Pattern Papers
2 Die cuts
1 Bling
Here is Louise inspiration for this challenge:
This is a 9x12 layout.
If you've never created 9x12 have a go at it ... it really challenges the creativity.
I've used Water colour to layer the background and then added some bling
This was great fun, can't wait to see your challenge entries.
Happy Scrapping
Due date Sunday, 23th April- Midnight.
Upload your challenge entry to the albums on our Mystical Scrapbooks Facebook Chat Page.
Our chat is private, and we love to have new crafty friends join us.
We will be giving away 1 gift voucher valued at $20.00 and each entry receives 1 ticket into the draw.....So the more challenges you do the more chance you have to win!
We will also have a surprise prize!! Our DT members will choose their favourite layout and I will send that lucky person a surprise in the mail.
The theme for the month is Black + 1 and my added challenge for the Cyber Crop is to add at least one patterned paper that you have made yourself.
You can create your patterned paper in many different ways. I have stamped on plain cardstock to create mine but you could use paste through a stencil to create an all over pattern, use ink through a stencil, add watercolours using the packaging technique, heat embossing and alcohol inks can also be used to create patterns on plain cardstock or even lightly patterned cardstock.
I filed around the edges of the photo, which is 8" x 5" then double matted it on the blue which is 8.25" x 5.25" and black which is 8.5" x 5.5" I added a piece of foam between the two mats.
To create the flower embellishments I stamped, using Embassy Arts Giant Flowers stamp block, and heat embossed two flowers on the Real Deal paper and one on the blue cardstock. These were then fussy cut and had a piece of chipboard added to the back.
I used a couple of pieces of chipboard to embellish my layout. A tab from Dusty Attics Mini Tabs #2 and a heart from Memory Maze's Criss Cross Heart Set. These were given a coat of Baby blue acrylic paint. The tab was later changed to black using a permanent marker.
A piece of ribbon and a couple of rows of bling were also added to finish off the embellishing.
The title was cut using Tim Holtz Inside Out alpha die from the blue cardstock and attached to the top left of the layout.
Here is the process video
Till next time
Stay safe
Hugs
Julie
***
Hi Crafters
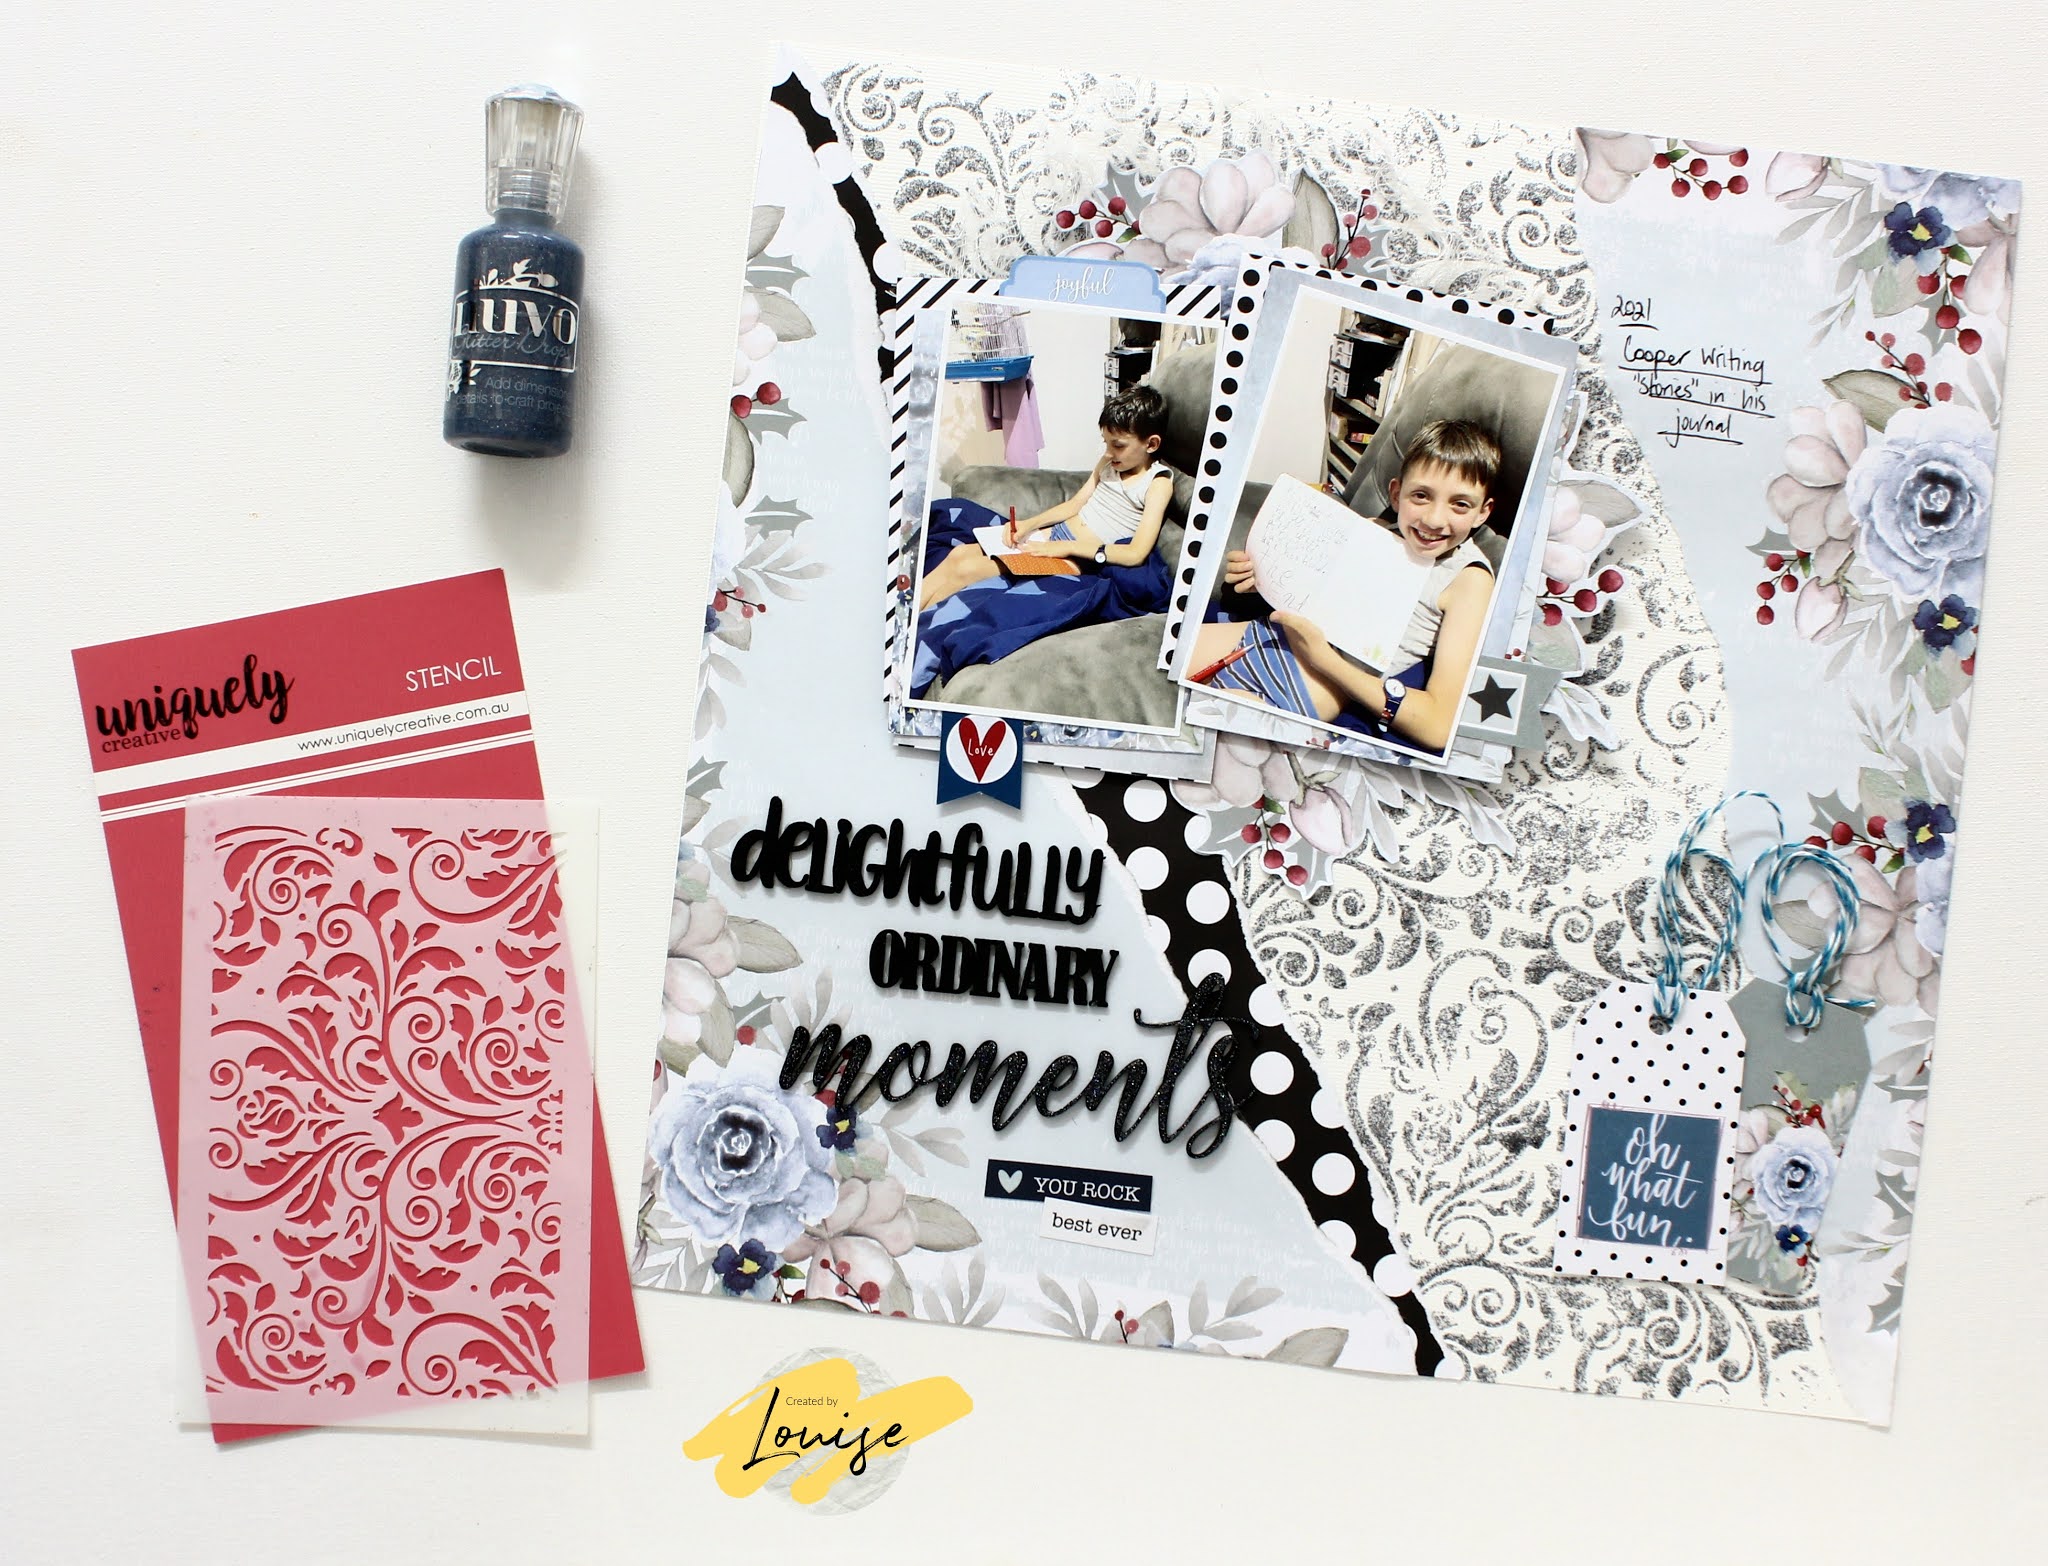
Louise here for this months cybercrop I'd like you to feature black and yellow.
For my share I wanted to show you that you can create a monochromatic layout in a different way.
Fairly self-explanatory this month.... use black and 1 other colour! You can add a small amount of neutral colours if you need to, such as grey, white etc...
Have fun!
Good morning Here is my April challenge
The theme for the month is Black +1 and this challenge is to use 3 elements from this grid. The elements must be in a line on the grid. The line can be horizontal, vertical or diagonal.
For my layout, I have chosen pink for my plus one and the three elements are Fussy Cutting, Tag and Chipboard (diagonal top left to bottom right)
The paper I have used on this layout is Uniquely Creatives's Serendipity- Happiness
I tore two opposing edges of the Black Cardstock, cut two strips of the Happiness patterned paper to 1.25" x 12", inked around three edges of the patterned paper and attached those to the top and bottom of the black cardstock to make it back to 12" x 12"
I fussy cut the two floral clusters from the edge of the Happiness paper, inked around the edges and attached them to the sides of the layout with glue.
I filed around the edge of my photos and matted them on bright pink cardstock (Heartfelt). They were then attached to the layout using double sided tape. I was careful to place the tape on the bottom photo so that my tag would be held in place when it was inserted.
I used my Scan N Cut to cut a tag from the Happiness paper and a mat from the Heartfelt cardstock. After inking the edges I used glue to attach one layer on top of the other. Using my Crop-O-Dile I add a pink heart eyelet to the tag. To finish the tag off I added some bright pink Rik Rac. My journalling is handwritten on the tag and the tag tucks under the right hand edge of the bottom photo.
The title was also cut from the Heartfelt cardstock. I used the negative to place my letters evenly on the top right area of the layout. The title then had a coat of Glossy Accents to give it a nice shine.
The chipboard butterflies are from the Memory Maze Wire Butterfly Set. I have painted them with acrylic paint. Once they were dry I added some Dress My Craft Frosted Sugar Powder to the bodies of the butterflies. I was not that happy with this as the sugar powder is a bit too chunky, I think something a bit finer, like glitter would have been a better choice
You can see my process video below
I hope you enjoy this challenge. Looking forward to seeing your lovely creations
And up load our page here - Facebook Gallery Albums
Challenge 1 - Sparkle and Texture
When thinking of this month's theme, my mind when to descriptive words, and sparkle and texture came to mind, so add some to your page!!
I've added texture with texture paste and a stencil, and sparkle with Wink a Stella on all my flowers.
I've used Cocoa Vanilla's Daydream collection for my page, I adore these colours, I fussy cut the flowers from Garden Variety paper, and layed with Sunshower.
I coloured some texture paste and used a stencil on 2 corners, then added a nice generous amount of Frosted Sugar for a bit of extra sparkle amongst my flowers!
Hope you have fun with this challenge!
Donna
Challenge 2 -
I am going with the "Fire" theme with this challenge
You are required to use Red, Orange & Yellow - You can use one, two, or all three of these colours plus use a stencil. I have used all three colours.
The inspiration for this layout came from a video by Allison Davis. You can see her video here.
The triangles on this layout reminded me of the Pyramids we saw while we were holding in Egypt, where this photo was taken.
To create the triangles I marked the middle of one side of each square and then cut from the two corners on the opposite edge to the centre mark. I cut approx 10 squares to begin with and placed them onto the layout leaving a thin white border between each triangle then I cut more triangles as I needed them to fill in the design and extend it out to the size I needed so the triangles were visible around each edge of the photo. Once I was happy with the placement of the triangles I inked the edges and attached them to the background using glue. I used my T-Ruler to make sure the first triangle was straight so all of the other triangles would be straight as I lined them up.
The photo measures 8" x 4.5". I matted this on white cardstock so it had a 1/16" border on all sides.
A piece of chipboard was attached to the back of the photo before it was added to the layout.
The words Sunset and Nile were cut on my Scan N Cut from black cardstock. To complete my title I used some stickers from Basic Grey.
My layout now looked like this and I had planned to stop here.
I had inked around the edges of each flower and attached them to the top left hand and the bottom right hand corners of the layout. So you can see the difference those few flowers made.
I have to admit I do prefer the layout with the flowers but the part of me that likes clean layouts is still pretty keen on the layout without the flowers
There is a process video and you can see it here.
Thank you for being here today.
Till next time
Stay safe
Hugs
Julie
Challenge 3 -
Hi Crafters ... Louise here.
My challenge is to feature the colour blue and use a stencil.
To finish I've added just a little bit of fussing cutting, some tags and cheese clothe.
Thanks for visiting ... I hope you have fun with this months challenge.
Process Video:
Happy Crafting
***
Challenge Info....
Due date Sunday, 28th March - Midnight.
Upload your challenge entry to the albums on our Mystical
Scrapbooks Facebook Chat Page.
Our chat is private, and we love to have new crafty friends join us.
We will be giving away 1 gift voucher valued at $20.00
and each entry receives 1 ticket into the draw.....So the more challenges you
do the more chance you have to win!
We will also have a surprise prize!! Our DT members will
choose their favourite layout and I will send that lucky person a surprise in
the mail.
Today I am sharing the layout I have created for the March challenge.
As you can see the theme for this month is Fire & Ice so I have chosen to scrap some photos from our 2015 holiday to New Zealand. One of the places we visited was Tasman Glacier, so lots of ice in these photos.
My challenge for you this month is to use torn papers and the colour blue on your layout.
The torn papers on my layout are to give the impression of waves on the water.
I embossed some Navy cardstock with my Kaisercraft Diamond Tiled embossing folder and then rubbed some Art Alchemy Metallique wax over the top of the cardstock so the wax adhered to the risen sections of the card
I have torn strips of paper's No 4, 6, 7 and 10 so they were about 1/2" wide, inked the torn edge and the two side edges and layered them at both the bottom and top of the layout, tucking each new layer under the previous one.
Another way I used the Art Alchemy Metallique Wax was on some resin pieces from my stash. I coated them with some acrylic paint to match the colours in the patterned papers then used my finger to apply the wax to the top surfaces of the resin.
A chipboard tab from Dusty Attics Mini Tabs #2 set was left in its natural state and added to the left hand edge of the top photo.
The title, which is the name of the place and the date the photos were taken was printed from my computer and attached to the back of the resin frame.
You can watch the process video here if you would like
Till next time
Stay safe
Hugs
Julie
Challenge 2
Hi Craft Friends
Louise here sharing my challenge for March ...
Use this moodboard to inspire you.
Maybe it's the colours (Red, pink, orange or yellow), maybe it's a fireworks photo you want to scrap, maybe you have a gorgeous autumn themed photo you love.
Moodboards are all about choosing your own inspiration.
I'll have my inspiration page up soon :)
Happy Scrapping
Challenge info...
Due date is the 31st March 2021 Midnight, to be eligible for the prize please make sure you have uploaded in to the correct album.