Good morning
Week 5 of the competition is all about Russia.
The challenge is to use a curve
The technique is distressing
The optional kit item is a flair
An entry for the competition can be a scrapbooking layout or a set of three cards. I have decided to do a set of cards for this week
The edges of all of the patterned papers on these cards have been inked to give that distressed look.
Let's start with
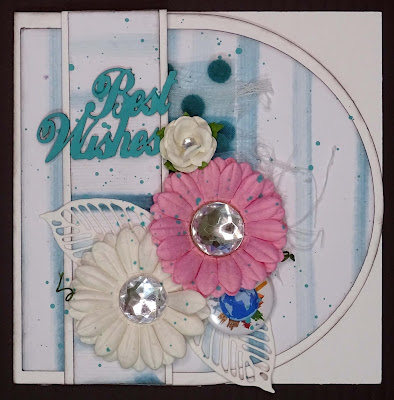
Card No. 1
I used my Scan N Cut to cut the card base with the curved front and the patterned paper mat for it.
The card is 5" square
The base is cut from white cardstock and the patterned paper is from Bee Arty's Find Paradise range - Recharge
I have added some cheesecloth/gauze to the front panel and some turquoise spotted ribbon on top of that.
I cut a 1.5" x 5" piece of white cardstock and attached a 1.25" x 5" piece of the same patterned paper on top of it. I added some chipboard scraps to the back of this panel before adding it on top of the ribbon so it was slightly off set.
A few flowers and leaves from my stash were added using my hot glue gun so I could be sure they would stay in place. I have added some clear gems to the flower centres for that lovely sparkle
I also added one of the flairs from the optional kit amongst the flowers.
I painted my chipboard sentiment from Memory Maze's Card Sentiment 2 chipboard set, with acrylic paint before attaching it to the card front. I also used the same paint to add some splatters to the card.
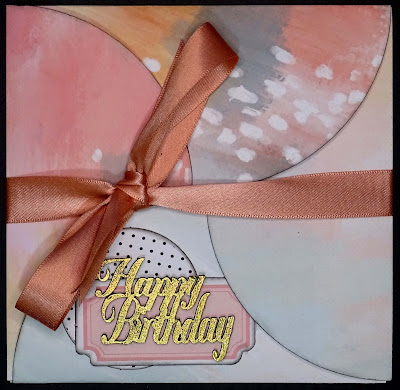
Card No. 2
I saw this design used as a pocket in a journal and thought it could be used for a card.
Once again I used my Scan N Cut to cut 4 x 5" circle from Cocoa Vanilla's Daydream Sweet Serenity patterned paper.
These were then folded in half and attached to each other to create a square shape. To do this you attach half of each circle to the circle next to it making sure to keep your edges square with each other and straight. (You can see how this is done in the video. It is a bit hard to explain the process)
I attached some 5/8" satin ribbon to the back of the card making it long enough to come around to the front of the card and tie a nice bow.
To decorate the front of the card I used a couple of elements from Uniquely Creatives Gums & Roses Creative Cuts and a chipboard greeting from the same Memory Maze chipboard set I used on the first card. I heat embossed the chipboard with gold embossing powder.
I added a 5" square piece of Bee Arty Find Paradise Recharge paper to the inside of the card to write a personal greeting.
And now to the last card for this set
Card No. 3
This was a very simple card to create but quite effective I think. It certainly gives that curved effect.
I cut a piece of A4 cardstock in halves longways to give me a card base that is 5 7/8" x 4 1/4"
I also cut a white cardstock panel that is 5 5/8" x 4" from the same cardstock.
I ran the panel through my Big Shot with Ultimate Crafts Shooting Raindrops embossing folder to give it some texture.
I used my Spellbinders Standard Circles Small dies to cut a 3", 2.5" and 2" circle from three different sections of the Bee Arty Find Paradise - Recharge paper.
I cut these circles in half.
I cut a piece of the pink section from the Bee Arty Find Paradise Recharge paper to 7/8" x 5" then matted that onto a piece of white cardstock so there is about a 1/16" white border all around the pink. I added some chipboard scraps to the back of this panel.
I then added my circle halves to the front of the card starting with the largest circle and working my way down to the smaller aligning the top circles to the right and the borrow circles to the left. There is about a 1/2" gap between the top and bottom circles.
The pink panel was attached then so it covered that 1/2" gap between the circles.
I die cut the word Celebrate from the darker patterned paper and attached it to the pink panel along with a pink paper flower and a pink flair from the optional kit
This is the video that shows how these cards came together.
Can't wait to see what you create for this weeks challenge
Till next time
Stay safe
Hugs
Julie


No comments:
Post a Comment